Wednesday, May 19, 2021

Time for farewell

Hey my friends. I'm sad right now because it's time to say goodbye, time always passes very fast. This is the last task, but not the last post I write. I promise I will back later and be here forever!

Bitmoji Image

In this post I would like to share with you a presentation that I have done about all the tasks that I have done during this semester. I used Prezi to finish this task because I like the template. However, I don't like to strongly recommend you this tool since the disadvantages that I found in the following:

  • You cannot embed anything inside the Prezi presentation.
  • You cannot even insert a link under a picture or a text, the only way you can do is to copy and paste the link on the page which makes me feel uncomfortable. 
  • I can not embed my presentation into this blog, the only way I can do is inserting the link of my presentation. 😭 That is a struggle for me.
Here I share with you the link to my presentation, in there you can see all my work during this semester. I hope you like it. Thank you my friends for accompanying me during the last weeks, I will see you soon. 

Record your video

Hey everyone! Nice to see you again with my wonderful video. Do you remember I told you last week my classmates and I were planning to make a video? Here it is!!!

Bitmoji Image

Recording and editing a video is not an easy case to handle, but after storyboarding it, you may have a clear structure about what are you going to do. So, after reading today's post and your storyboard, I'm sure you will have a fantastic video!

The first thing that we have done when we were preparing to record the video is making a script. As I wrote in the Podcast post, a script can help you and remind you when you recording everything. Therefore, we made a script in Google Doc with the dialogue that we will say in the video. Thanks for this script which makes our recording successfully. Here I embed our script so you can take a look. 😄

Once have your script, it's time to record! The recording is very easy that you just need to remember the general dialogue and see it in front of the camera. It's petty that we had to wear mask since the pandemic that you cannot see our smile under the mask.
When we had the video recorded, we decided to cut it shorter because it was too large to edit. We use the application VideoPad to cut the fragments that we won't use. VideoPad is a free tool that you can cut your video in a very simple way. But cutting the video was still a little struggle for us because we needed to play the video by each frame. Anyway, we got the video ready for adding some effects! 
For editing the video, we have chosen the application Filmora to finish it. We added some effects such as pictures, subtitles for important points and absolutely the music. All the resources we added have the creative common licence, don´t worry about it! 
Here I want to share with you our video, it is designed for six graders of Primary Education. This video is a debate about the Friday For Furture, which is a movement for avoiding the climate change. We decided this topic because we thought this is very useful for students and we can use it for Natural Science subjuct. Take a look of this video and leave your comment about this video!
To sum up, I would say that creating a video is not a simple task. In factt, it was the hardest task that I have done ever about ICT. But finally we got it and we are very proud of it. Here I leave the link of my parter´s blog, read their post and hope you like it! Finally, thanks all the cooporation and help from my partner´s, you are all super teachers!💟


Sunday, May 9, 2021

Storyboard your video

 photo of you happily swinging on a swingHey my friends! How about your weekend? I'm so glad of the wonderful weather of this week. Last week, my classmates Marty's Learning, Nurinu teacher, It's pateacher conrner and I planed to shot a short video about Friday for Future for our students. Friday for Future is a movement about climate change and protect our planet. We thought it is useful and meaningful for children in this period. Therefore, we decided to record a video for children in order to understand it perfectly.

But before recording the video, it is important to make a storyboard that can help us record and present what we want to include in this video. We have chosen Canva, the same tool which I used for the infographic. It is a free template that you can create plenty of cells without costing anything. Moreover, there is a timeline as well which we wrote the timeline that we created this video. 

I'm embedding our storyboard here and you can take a look at it. I will show you the video that we recorded related to this storyboard in the next post, just wait for it! Hope you like our storyboard and see you next post. 


Story Board - YouTube video by Patricia Rubio

Tuesday, April 27, 2021

Podcast


Hello everyone! Nice to meet you again! Today I want to share with you another amazing resource in the CLIL lesson, the podcast!  I love using podcast in my CLIL class to welcome my student. Also, I´d like to use the podcast to send tasks for homework. Moreover, we can ask students to make their own podcast at the end of one unit or session to make a summary of the contents. 

Apart from what I mentioned above, there are various advantages when we use podcast. Such as it can strongly train the oral comprehension competence of our students when they listen to the podcast. It is similar to the track of lessoning practice but more interesting! Students will enjoy the podcast meanwhile they are learning or practising. Then, students will have more exception when we use the podcast to introduce a new unit or welcome them to a new course, it makes them more comfortable and confident. Finally, if we ask students to make a podcast by themselves, it can definitely develop oral expression and creative skills. But remember, this is an ideal task only for students of fifth or sixth grades, who have already maintained the technical skills and can achieve the linguistic requirement. Younger students are too young to carry out this task. 

I just made a podcast for welcoming the students of my third-grade pass to the new topic in Social Science. Here I would like to give you some instructions and suggestions in the editing process.

Firstly, we need to write a script. A clear and logical script can help us a lot in the recording process. Once we start recording, we may pause or make some errors caused by the nervous emotion. At this moment, a script can help us pass it perfectly. I wrote a script in Google Doc to guide me during the recording, I´m sharing you here and you can take a look.

Once we are ready, it´s time to record! I used the recorder from my mobile phone which is very simple and it doesn´t cost me any time when I recorded my track. There also are some websites that can help me to record your content, just choose the one which is easiest for you! After recording the content, don´t you think we´d better add a little bit of music? At least for me yes I want! I recommend you a Youtube channel name "Audio Library", there is plenty of music you can download for colouring your podcast. It´s free and very simple to download. 

Quiet Night by Tokyo Music Walker
https://soundcloud.com/user-356546060
Creative Commons — Attribution 3.0 Unported — CC BY 3.0
Free Download / Stream: https://bit.ly/32AnEtv
Music promoted by Audio Library https://youtu.be/ixw5XYtYGGQ

Travel Lovers by Vendredi https://soundcloud.com/vendrediduo
Creative Commons — Attribution 3.0 Unported — CC BY 3.0
Free Download / Stream: https://bit.ly/3rTXhJz
Music promoted by Audio Library https://youtu.be/S9W64vJEN1I

Now, we have all the contents that we need, it´s time to edit it. I have chosen Audacity in this step to edit my podcast. Audacity is a free APP for editing your records or podcasts. It is very simple to handle. I combined my track with the background music into one track and exported it to my computer. 

Last but not least, we have to upload our podcast!!! For uploading, there are a lot of websites you can choose for storing your podcasts. I used Soundcloud this time as a storage of my podcasts. Soundcloud is not only a stock of your own podcasts, but also you can share other track or podcast that illuminates you. In addition, you can follow your favourite artists and obtain their inspiration for the first time! There is also a free trial that you can upload your podcasts without coasting anything. Here I would like to share with you my Soundcloud channel that you can explore. 

Here I embed my podcast and the playlist I created for organizing my contents. Just listen to it and hope you like it! Thanks for your reading and hope it was useful for you. See you next post!!!


Creative Commons License
This work is licensed under a Creative Commons Attribution-NonCommercial-ShareAlike 4.0 International License.

Monday, April 19, 2021

It's time to change your presentation


Bitmoji Image

Hi there! I hope you have had a nice weekend. Today, I'm here with a fantastic tool that can help you make a better presentation --- Genially. 

I prefer to use Genially in my classroom because it can make my presentation more active than the traditional presentation such as PowerPoint. With Genially, I can design some questions during the presentation that make students pay attention to the presentation and follow me better. Moreover, we can do more invented games with genially, such as an Escape Room! There are a lot of buttons that we can insert to move the page to wherever we want. Compare, it's more visual and convenient than PowerPoint. 

Here I would like to show you a presentation that I made about renewable energy in Natural Science, after presenting the content, there are two simple questions that can be done with students to check if they have understood the content. In this presentation, I have used a number of slides to present the definition and importance to use renewable energy and 3 commontypes of renewable energy --- solar energy, wind energy and hydrppower energy. In the part of wind energy, I inserted a video about how the turbines work for generating electricity aswell, that make students can understand it easier and more visual. At the end of the presentation, I added two simple questions for students to answer. They are very simple, only for giving an immediately feedback about the content. If there awser is correct, the slid will jump to the page which says CORRECT and click my avatar for the following question, if not, it will move to the other page wich syas TRY AGAIN and click my avatar to repeat the question. 

Take a  look and hope you may enjoy the Genially! 

Wednesday, April 7, 2021

Infographic-the most frequently resource I use!

laptop teachingHi guys! nice to see you again here! This time I want to show you a fantastic tool that I have used ever, Canva. It is a  website that provides you plenty of templates and elements to help you prepare your CLIL lesson. This time we will concentrate on infographics. Infographic is a very useful and visual resource for students to help them summary the content and make the learing easier in CLIL lesson.

Canva is an amazing website that I used so far. It is very simple to use which doesn´t take your time for learning how to use it. Moreover, there are a lot of elements that you can add to your infographic, the icons are very diverse and there are almost all the icons you need for kids! The most positive point of this tool is all the elements you need are free!!! I have not found out any limitations that affect me during my editing process. In addition, if you want to make a resource with your partner, just click "share" and invite your partner or sent the link, then you can do it together.

Here I´m showing you an infographic that I made that related to the topic of renewable energy in Natural Science. Take a look and I hope you like it! Enjoy your adventure in Canva and see you next day :) 


Renewable Energy Infographic by Lucy Lai

Let's mindmap!

Hi again! I hope you are enjoying with comic, here I want to show you another useful resource that can be used in your CLIL classroom, mindmaps! A mindmap is very visual and effective for students in their learning, especially for the review of a unit. Mindmap can bring students a general idea about this topic and help them organize the contents that have leaned in this topic.
There are a lot of tools to make a mindmap, today I would like to share with you my experience in Mindmeister. It's such a useful tool that you can use on every topic and edit it in a very simple way! Every time you edit it, just press the "tab" of your keyboard for adding a subgroup of your topic and "enter" for adding another group. It's really a recommendable tool for CLIL teachers, here you can see the strong point and the weakness of this tool:

Strong point:

  • It is retractable that when you show it to your students, you can hide the group if you want to ask them questions about it.
  • You can use emojis for representing a type of objectives.
  • You can add videos into your mindmap which we can combine the mindmap with another visual resource.
  • There is a free plan, you can enjoy it even if you don't want to pay for it.
  • It can share with others, in this way, you can edit it with your colleagues! 

  Weakness:

  • There are some limitations if you enjoy it in a free plan. You cannot add pictures that are uploaded from your computer, neither can download the mindmap.
  • The stock of emojis is not such advanced as we find on our mobile phone, there is something missed.
Here you have the link to the mindmap that I have made for students in 3rd grade of Primary Education, it related to the topic of animals in Natural Science. Take a look and try to make one for your students!

Hope you like this post and have a nice day!


laptop reading

Time to use comic to represent emotions!

Hi everyone, I'm back! I hope you all have passed a nice vacation! Today I'm here to show you a new resource -- comic! The comic is a visual resource that engages students a lot, with the kid-friendly language, the comic is much easier to understand than a large amount of text.

The tool that I used for my comic is named Storyboard. It is a very simple and visual website to create your own comic. There are a lot of versions you can create as the material for your lesson, which is more effective for students in a CLIL lesson. The basic plan of Storyboard is free, compare with other tools, there are plenty of templates and characters you can choose for your comic in different scenes. The other strong point I have found out in Storyboard is that you can change the position of your character! Sometimes you may don't want to your character stand up or face someplace, in this way you can change his/her position even the gesture. 

However, there are some disadvantages that I found when I was using this tool. Firstly, as you can find in any free trial which is very limited. You can only make 6 cells each time if you want your comic to be more extended, you have to create another one and combine the two photos into one use other tools. The other limitation of the free plan is you cannot download the comic without a watermark. But once time you download the photo with the watermark, you can find there is a watermark in every cell instead of only one, even it covers your content. Therefore, in this case, I have made a screenshot for each comic and combined it into one picture.  On the other hand, during the making process, I found that every item or element can not be rotated, which is not very convenient when we want the element to be more fittable to the scene. 

Even though there are some disadvantages to this tool, it is recommendable for primary teachers to use when planning your lesson!  Here  I would like to show you a comic which made by myself, you can see it as an example and start your adventure at Storyboard! 

That's all I want to share with you today, thanks for your visiting and hope this tool could be useful for you! See you next time! Creative Commons License
Emotional Comic by Aurora is licensed under a Creative Commons Attribution-NonCommercial-ShareAlike 4.0 International License.
Based on a work at https://www.storyboardthat.com/my-account21?buyNow=False.

Wednesday, March 17, 2021

Content curation - Pearltrees

Hi everyone! Nice to meet you again, today I´m haere to recommand you a new webpage, which called Pearltrees. With this website, you can collect all the resources that you have prepared for your CLIL lesson. It is easy and clear to work and you can creat various folders to classify your resources. It will make you easier to find everything you need for your lesson. I´m going to show you my Pearltrees here, have a look and see how it works!

Click here to visit my Pearltrees.

Hope you like it and it was useful for you! See you soon!


Resources for CLIL lesson, by auroralailai

Monday, March 15, 2021

Images for a class of Natural Science

Hi everyone! Nice to see you again! Today, I´m being some images that I found for a Natural Science lesson in third grade. The topic of this lesson is "How do you know how old is a tree?". This lesson is related to the types of plants by their stem and how to classify them. I want to show you some images that I will use in the class and explain why I use them. Don´t wait anymore, go to read it and hope you like it!

Before reading it, I would like to tell you something, Everyone is a creative person, it is important to respect the work which made by others. Therefore, every image that I used belongs to the Creative Common, each resource that you find on the internet with this symbol means you can download and use it in your work. There are various websites that you can find a resource with this symbol, it is very easy but useful for us to get good material. 

Tree 


"Tree" by jrsnchzhrs is licensed under CC BY-ND 2.0

I have chosen this picture because it is very visual. There is only one tree, so I can explain it as clear as possible. This image shows all the physical characteristics that a tree has, such as the strong, high and hard stem which is called a trunk; some and branches. There also shows that the tree is very tall with is the highest plant. 

Trunk


by Pexels
Free for commercial use/No attribution required

This image shows the rings of a trunk clearly. The topic of this lesson is "How do you know how old is a tree?", we can count the rings of the trunk to know it, one circle represents one year old. We can use this picture in class and let students count the rings to know how old it is this tree. 

Bushes


By music4life 
Free for commercial use/No attribution required

I would like to use this picture to explain the features of the bushes. I have chosen this picture because this photo not only shows a bush but also there are some trees behind the bush. It can show students that bush is shorter than trees. This image can help me explain the main features of the bush, which has many low branches and more than one stems. 

Grasses


"Grass" by Dredrk aka Mr Sky is licensed under CC BY-ND 2.0

With this picture, I can explain to students how to identify grasses. The stems of grasses thin and short as we can see in this picture. Also, it shows that grasses are flexible that they can bend in the wind. In general, It can help me explain all the characteristics that students need to know. 

That's all I want to show you today, hope you like it. See you next time!

Friday, March 5, 2021

Let's know Aurora with me!


Hey everyone, Here is Auui! I'm the avatar of my dear friend Aurora. Thanks for the modern technology that you can know something about Aurora with me. In this blog, I would like to show you something about Aurora's life! You can guess the facts about her with my help! Are you ready? Let´s start!

I am a student of ... 

art supplies

I love teaching and I always enjoy the time with kids 🙋

I am a sandwich...
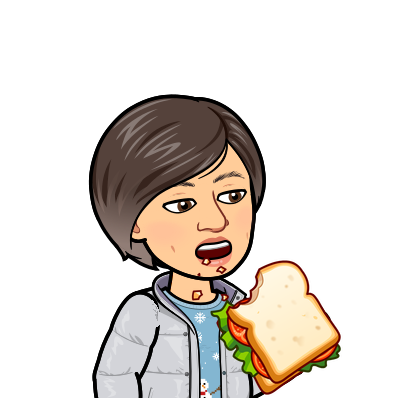
eating a sandwich

Actually, I love everything about diet. It is a culture and an important part of my life. Food makes my life bright.

Inside of a girl, a student or a daughter of my parents, I prefer people to identify me as a ... 
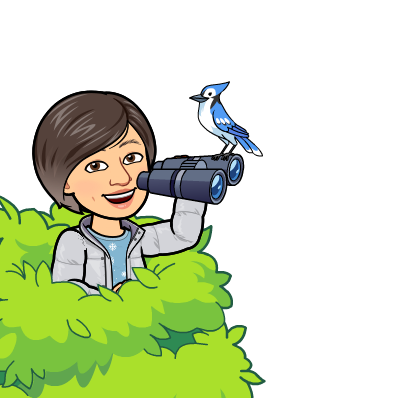
tree binoculars

Every trip for me is an adventure, I love doing something which people think a little bit "strange", such as I decided to come to Spain alone 5 years ago. Every problem will be solved with a plane or train ticket, if not, plus a beer! (⚠But, this only existed in the period of pre-Covid.)

If I was not a teacher, I would like to be a ...

cooking

I really told that to my father. In my world, the kitchen is the most comfortable and the best place. I don´t like waste time to anywhere except in the kitchen! Don´t you think that cooking or baking can make you calm down?

Finally, let me tell you some secrets. Please do not tell them to my Mom⛔
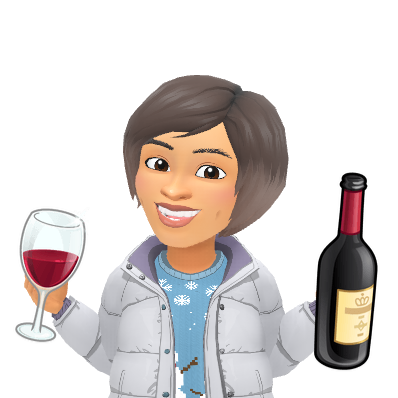
wine timeBitmoji Image

Finally, I want to tell you something about me, a virtual avatar. Aurora has chosen the App Bitmoji to creat me. She thinks it's a simple and useful app to create an avatar of a person.  In this App, the only thing you have to do is take a selfie and you can choose a series of hairstyle, make-up, close, etc... Once you finished it, you will get various pictures of your avatar and you can use it in whatever situation you want! 

For educators, an avatar is an interesting and funny tool to interact with students. IN this situation, students will feel more relaxed when seeing your avatar. Hope you like me and this app can help you! Have a nice weekend and see you next post!

Auui